

How To Choose The Right Trekking Poles 2026
Trekking poles are the single most impactful piece of gear I carry, yet they remain the most misunderstood. They aren't just for balance on a scramble; they are a critical load-management system that reduces impact on your knees by up to 25% and allows you to engage your upper body for sustained climbing efficiency. Choosing the wrong pair means carrying dead weight or dealing with mechanical failure at mile 300, so getting the specs right is non-negotiable for a comfortable thru-hike.
Our Top Picks
Affiliate disclosure: if you buy through these links, we may earn a commission at no extra cost to you.

Table of Contents

Field Answer
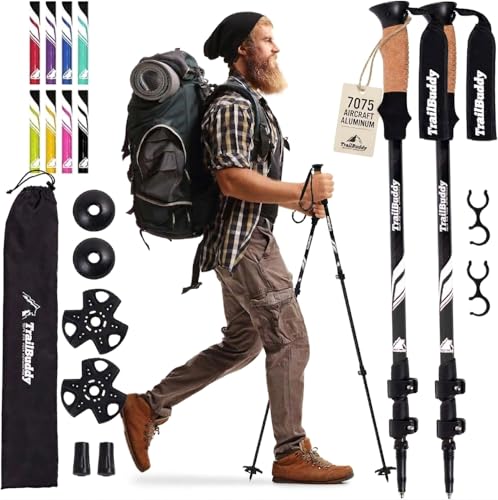
To choose the right trekking poles, prioritize a locked weight between 17oz and 22oz per pair for durability without excessive bulk, and select 7075 aluminum shafts if you tend to whack roots or rely on them for emergency shelter construction. Ensure the pole collapses to fit your pack's side compression straps and features an adjustable wrist strap system that allows for quick length changes without removing your hand.
Shaft Material: Aluminum vs. Carbon Fiber
The debate between aluminum and carbon fiber is the first fork in the road. For years, I ran carbon fiber because it vibrates less and saves ounces. However, after snapping a shaft on a hidden basalt rock in the Sierras, I shifted my philosophy. 7075-T6 aluminum is significantly more ductile. When you hit an immovable object at full stride, aluminum will bend; carbon will shatter. If you are hiking technical terrain or building emergency snow shelters, aluminum is the only responsible choice.
Carbon fiber still holds a place for pure speed hikers who stay on maintained trails and prioritize gram-counting over durability. It also dampens vibration better, which helps if you have existing wrist or elbow tendonitis. In wet conditions, carbon shafts can sometimes become slippery if the anodized coating wears off, whereas aluminum grips remain consistent.
Locking Mechanisms: External vs. Internal
The reliability of your pole is entirely dependent on its lock. Externally locking poles (like the classic Black Diamond Trail or Leki models) use a lever that clamps down on the shaft from the outside. These are field-serviceable; if ice jams the mechanism, you can pry it open with a rock or stick. They also allow you to adjust the length of each pole independently, which is crucial for steep ascents versus descents.
Internally locking poles (like the Ultralight Z-poles) use a twist-lock or flip-lock mechanism hidden inside the shaft. They are sleeker and less likely to snag on brush, but they are notorious for freezing up in cold weather or gumming up with mud. If you hike in winter conditions or muddy environments, avoid internal locks unless you are willing to carry cleaning supplies.
Weight and Collapsed Length Logistics
Weight is subjective, but for a standard 4-segment pole, anything under 17oz per pair is considered ultralight. Between 17oz and 24oz is the "sweet spot" for durability and cost. Above 24oz, you are generally paying for premium branding or specialized features that don't impact trail performance significantly.
Collapsed length is often overlooked but vital. Your pole must fit inside your pack's side compression straps or clip securely to the exterior without wobbling. If your pack has a top-loading design with no side access, ensure the pole can be inserted through the main compartment or that the collapsed length is short enough (usually under 13 inches) to fit vertically.
Grip Comfort and Strap Ergonomics
Your hands will sweat, rub, and blister. Cork grips are the gold standard for long-distance hiking because they mold to your hand shape over time and absorb moisture rather than sliding against wet skin. Foam grips are cheaper and lighter but tend to degrade and become slick when wet. EVA foam is a middle ground, offering good cushioning without the molding requirement of cork.
The wrist strap is arguably more important than the grip itself. A poor strap forces you to squeeze the pole handle constantly, leading to premature forearm fatigue. Look for straps with a "quick-adjust" system that allows you to slide your hand in and out while keeping tension. The strap should bear the weight of your body when planting the pole, not your fingers.
Spearhead Tips and Basket Selection
The tip of the pole determines traction. Tungsten carbide tips are standard for rock and dirt, providing excellent bite on loose scree. Some poles come with rubber "mushroom" caps that snap over the tip; these are essential for hard-packed snow or ice to prevent the pole from piercing too deeply and getting stuck.
Baskets (the circular disc near the bottom) keep the pole from sinking into soft ground. Small baskets are versatile for general hiking, but if you plan on winter travel or crossing deep mud, you need large "snow baskets." Conversely, if you are trail running, you might opt for no basket at all to save weight and reduce mud accumulation.
Frequently Asked Questions
Should I buy one pole or two?
Always buy two. Single-pole systems lack the stability needed for river crossings, steep descents, and fatigue management on long days.
How do I determine the correct pole length?
Stand upright with your elbow at a 90-degree angle. The tip of the pole should touch the ground exactly at your elbow. Adjust for terrain: shorter on climbs, longer on descents.
Can I use trekking poles for scrambling?
Yes, but ensure they have a secure lock and a sturdy tip. Some hikers prefer "grip-and-go" systems that don't require unlocking to adjust length quickly on technical rock.
Do trekking poles help with uphill efficiency?
Absolutely. Proper pole use engages your quads and upper body, distributing the workload and reducing heart rate by up to 15% on sustained grades.
How do I pack poles in a stuff sack?
Disassemble them if possible. If they are non-collapsible, strap them externally using the loop system on your pack's shoulder straps or hip belt.
Are collapsible poles worth the extra cost?
If you value pack space and weight, yes. They allow you to clip the poles to your pack while hiking through dense brush or camp, keeping them clean and dry.
Choosing trekking poles is about balancing your specific trail conditions with your body's needs. Whether you prioritize the vibration dampening of carbon fiber or the rugged reliability of aluminum, ensure your choice fits your pack logistics and grip comfort. Once you have your pair, spend time adjusting the tension on the wrist straps; that small adjustment will define your comfort level more than any technical spec.


