

How To Choose The Right Insulated Sleeping Pads 2026
Author: Ryan Caldwell
After logging thousands of miles on the Appalachian Trail and the Pacific Crest, I’ve learned that a sleeping bag is only as warm as the ground beneath it. You can carry the most expensive down quilt in the world, but if your core temperature drops because you’re lying on frozen earth with zero R-value, you’re going to have a miserable night. Choosing the right insulated sleeping pad isn't just about comfort; it’s about thermodynamics and survival. In 2026, the market has shifted toward lighter materials and higher efficiency, but the fundamental physics remain unchanged: you need to stop heat loss through conduction without sacrificing weight or packability.
Our Top Picks
Affiliate disclosure: if you buy through these links, we may earn a commission at no extra cost to you.
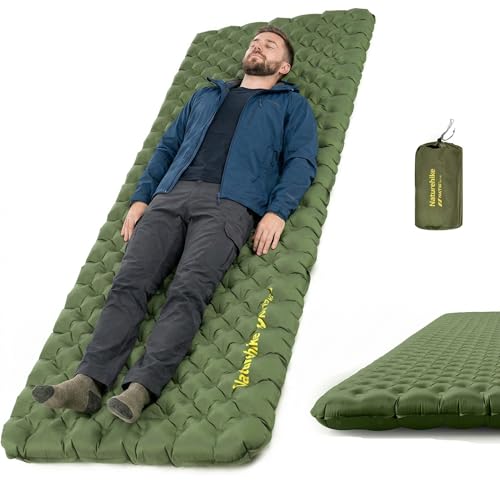
Table of Contents


Quick Answer
To choose the right insulated sleeping pad, match the R-value (thermal resistance) to your expected lowest temperatures: an R-value of 3.0+ is essential for three-season hiking, while 5.0+ is non-negotiable for winter or high-altitude thru-hiking. Prioritize a packed size that fits inside your backpack’s stuff sack and a weight under 20oz if you are chasing ultralight goals. Finally, ensure the pad’s length accommodates your height to prevent cold spots at your feet.
Understanding R-Values and Thermal Resistance
The R-value is the single most critical number on a sleeping pad spec sheet. It measures thermal resistance—the pad’s ability to stop heat from escaping your body into the ground. The higher the number, the warmer you stay. For three-season hiking (spring through fall), an R-value of 3.0 to 4.0 is generally sufficient for most hikers in temperate climates. However, if you are planning a winter thru-hike or camping above treeline where temperatures drop below freezing, you need an R-value of 5.0 or higher.
I often see beginners make the mistake of buying a pad based on comfort alone. A plush, high-loft pad with an R-value of 1.5 feels amazing in your living room but will leave you shivering on a 30-degree night in the Sierra Nevada. Conversely, don’t over-engineer for summer. Carrying a heavy, high-R-value pad in July adds unnecessary weight and bulk when you’re sweating through your shirt anyway. Always check the manufacturer’s tested R-value, not just their marketing claims.
Weight vs. Packed Size: The Ultralight Trade-off
In the ultralight community, every ounce counts, but so does pack volume. Traditional air pads with internal baffles often weigh between 15 and 25 ounces and pack down to the size of a water bottle. However, newer vacuum-insulated panels (VIPs) or high-pressure thermobaric designs can offer superior warmth-to-weight ratios. For example, a VIP pad might weigh only 10 ounces but provide an R-value of 6.0, whereas a traditional foam pad with that same R-value would weigh 30 ounces and take up half your pack space.
When evaluating weight, look at the "packed weight" rather than the trail weight if you plan to stuff it tightly. Some pads come with compression sacks that reduce their size significantly, while others rely on their own structure. If you are using a frameless backpack, your pad must fit inside the main compartment when rolled or folded. A pad that packs larger than your sleeping bag is useless for minimalist setups.
Insulation Types: Synthetic, Down, and Air
The technology behind insulation has evolved. Traditional synthetic foam pads are durable and cheap but heavy and bulky. Modern air pads use trapped air columns for structure, but the real innovation is in the insulation layer between the inner chamber and the ground.
Synthetic Insulation: Most mid-range pads use synthetic fill (like Primaloft). These are reliable, perform well when damp, and are generally more affordable. They offer a good balance of durability and warmth for budget-conscious hikers.
Down Insulation: High-end ultralight pads often use goose down. This offers the best R-value per ounce but comes with a high price tag and requires careful maintenance. If your pad gets wet, it loses loft and warmth. Down is ideal for weight weenies who prioritize minimal pack weight over durability.
Vacuum/Thermobaric: These pads use rigid panels or high-pressure chambers to minimize air movement. They are incredibly light but can feel less comfortable than traditional baffled designs because they don’t conform to your body shape as well.
Durability and Trail Performance
No matter how warm your pad is, it’s worthless if it punctures on a thorny patch of brush. Trail durability depends largely on the denier (thickness) of the fabric used on the bottom surface. A 15D to 20D nylon is standard for ultralight pads but feels fragile; you must be careful around sharp rocks and branches. For bushwhacking or rocky terrain like the White Mountains, opt for a pad with a 30D to 75D bottom layer or a reinforced patch.
Valve reliability is another critical factor. Screw-top valves are generally more reliable and less prone to leaking than push-pull valves, which can get clogged with dirt and grit on the trail. I’ve seen too many hikers stranded in the cold because their valve mechanism failed after a few weeks of use. Always test your valve before you head out, and carry a small repair kit with patches and adhesive.
Fit, Comfort, and Shape
Comfort is subjective, but width and length are objective. Standard "regular" pads are often only 20 inches wide, which can feel confining for broader hikers. If you sleep on your side, a wider pad (23+ inches) prevents your hips from sinking into the ground, which causes pressure points and disrupts sleep. Length is equally important; if your feet hang off the end, they will freeze. Measure your height and choose accordingly.
The shape of the pad also affects stability. Rectangular pads offer maximum surface area but can bunch up at the feet. Contoured or mummy-shaped pads fit your body profile better and reduce excess material that can flap in the wind. However, contoured pads are often narrower at the hips, so ensure you have enough room to move without feeling trapped.
Frequently Asked Questions
Do I need an insulated pad for summer hiking?
Yes. Even in summer, ground temperatures can drop significantly at night, especially in alpine environments or after rain. A low R-value (1.0–2.0) pad is sufficient for hot weather, but zero insulation will lead to heat loss and discomfort.
How do I know if my sleeping pad is leaking?
If you wake up feeling colder than usual or notice the pad has lost firmness, it’s likely leaking. Listen for a hiss or feel along the seams with your cheek. Minor leaks can often be fixed with a patch kit, but major valve failures may require replacement.
Can I use a sleeping pad inside a hammock?
Standard inflatable pads are not designed for hammocks and will slide off. You need a hammock-specific underquilt or a pad designed with straps or a contoured shape to fit inside the hammock’s footprint.
What is the lightest insulated sleeping pad available?
Vacuum-insulated panels (VIPs) are currently the lightest option, with some models weighing under 10 ounces. However, they are expensive and less durable than traditional air pads.
How do I store my sleeping pad to maintain its lifespan?
Always store your inflatable pad fully deflated and loosely rolled in a stuff sack. Do not leave it inflated for long periods, as this stresses the seams and materials. Keep it away from direct sunlight and extreme heat.
Conclusion
Choosing the right insulated sleeping pad requires balancing your thermal needs, pack weight limits, and terrain challenges. There is no single "best" pad for every hiker; instead, there is a best pad for your specific itinerary. Start by determining your required R-value based on your destination’s climate, then narrow down options by weight and packed size that fit your backpack. Test your gear before committing to long-distance trails, and prioritize durability in areas where sharp rocks or dense brush are common. Your sleep quality directly impacts your hiking performance, so invest the time to get this right.


