

How To Choose The Right Camping Cookware Sets 2026
By Ryan Caldwell
After spending three years on the Pacific Crest Trail and countless weekends in the Sierras, I’ve learned that your stove system is just as critical as your shelter or sleeping bag. A bad cookware setup can ruin a day's hike with heavy packs, leaking fuel, or cold meals when you need calories most. Choosing the right system isn't about buying the lightest titanium spoon; it’s about balancing weight, durability, and thermal efficiency for the specific terrain you are navigating.
Our Top Picks
Affiliate disclosure: if you buy through these links, we may earn a commission at no extra cost to you.

Table of Contents
- Our Top Picks
- Quick Answer
- Determine Your Group Size and Volume Needs
- Material Matters: Titanium vs. Aluminum In the ultralight community, titanium is king, but it comes with a steep price tag. Pure titanium cookware is incredibly light—often under 200g for a full set—but it is expensive and conducts heat poorly. This means you have to be careful not to burn your food if frying, as hot spots develop quickly. For budget-conscious hikers or those prioritizing heat distribution, hard-anodized aluminum is the practical choice. It is heavier (often double the weight of titanium) but distributes heat evenly, making it much easier to cook actual meals without scorching. Look for pots with a clad bottom (aluminum core sandwiched between stainless steel) to get the best of both worlds: durability and even heating. Stove Compatibility and Heat Transfer
- Durability and Trail Performance
- The "Nest" Factor: Packing Efficiency
- Frequently Asked Questions
- Conclusion

Quick Answer
To choose the right camping cookware set, match the pot volume to your group size (one person needs a 750ml–1L pot; two people need 1.5L+) and prioritize material based on your weight budget: titanium for ultralight durability or hard-anodized aluminum for budget-friendly heat distribution. Ensure your pot has a flat bottom if using canister stoves, or a wide rim if you plan to boil water directly over an open fire.
Determine Your Group Size and Volume Needs
The most common mistake I see hikers make is buying a "one-size-fits-all" pot that is either too small or absurdly large. For solo thru-hiking, you do not need a massive pot. A 750ml to 1L titanium pot is the sweet spot for boiling water for dehydrated meals and making coffee. If you are hiking with a partner, aim for a 1.5L to 2L pot that can accommodate two mugs or a small frying pan insert.
Consider your typical meal style. If you are strictly eating dehydrated backpacking meals (Mountain House, etc.), you only need enough volume to boil water and let it soak. However, if you plan to cook fresh food like pasta or stir-fries on the trail, you need extra headspace to prevent boiling over, which is a nightmare in windy conditions.
Material Matters: Titanium vs. Aluminum
In the ultralight community, titanium is king, but it comes with a steep price tag. Pure titanium cookware is incredibly light—often under 200g for a full set—but it is expensive and conducts heat poorly. This means you have to be careful not to burn your food if frying, as hot spots develop quickly.
For budget-conscious hikers or those prioritizing heat distribution, hard-anodized aluminum is the practical choice. It is heavier (often double the weight of titanium) but distributes heat evenly, making it much easier to cook actual meals without scorching. Look for pots with a clad bottom (aluminum core sandwiched between stainless steel) to get the best of both worlds: durability and even heating.
Stove Compatibility and Heat Transfer
Your cookware must match your heat source. If you are using a standard canister stove (like a Jetboil or MSR PocketRocket), your pot needs a completely flat bottom to sit securely on the grate. Rounded bottoms will wobble, leading to spills and wasted fuel.
If you plan to use an open fire or a wood-burning stove (like a Firebox or Bushbuddy), look for pots with a slightly rounded bottom that can cradle into the flame base, or ensure your pot is wide enough to sit stably on rocks. Avoid non-stick coatings if you are cooking over coals; they degrade rapidly under high heat and can release toxic fumes.
Durability and Trail Performance
On the trail, gear takes a beating. Titanium is dent-resistant but can puncture if you accidentally drop your stove onto it with force. Aluminum dents easily, which affects stability on stoves, but it rarely fails catastrophically. For long-distance thru-hiking where resupply points are far apart, titanium’s longevity justifies the cost.
Look for reinforced rims and sturdy handles. Plastic handles can melt if you lean the pot too close to the flame, so integrated metal handles or silicone-wrapped wire handles are safer bets. Also, check the lid fit—a loose lid lets heat escape, slowing down your boil time significantly in cold weather.
The "Nest" Factor: Packing Efficiency
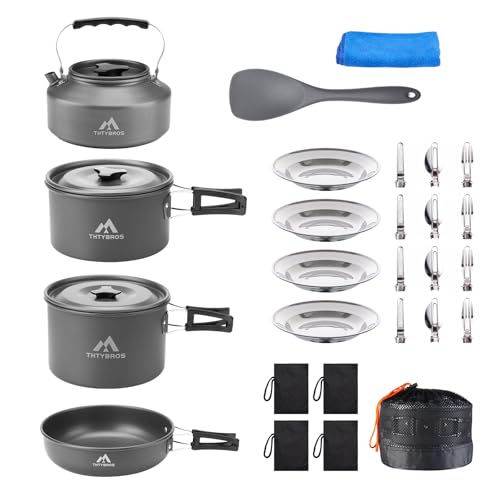
Weight isn't the only metric; volume matters too. In a packed backpack, every cubic inch counts. The best cookware sets are designed to "nest," meaning your mug, spoon, and stove fit inside the pot. This keeps your gear organized and reduces the overall footprint of your kitchen system.
When evaluating sets, look for nesting mugs that double as bowls. This eliminates the need to carry separate dishes. However, be wary of cheap nesting systems where the items are glued together; you want pieces that slide apart easily but fit snugly during transport. A well-designed nest can save you significant space in your pack, allowing you to carry more food or water.
Frequently Asked Questions
Do I need a separate frying pan?
Only if you cook fresh meals often. For most backpackers, the pot doubles as a frying pan. If you do need a separate pan, look for one that nests inside your main pot to save space.
Is titanium worth the extra cost?
If you are ultralight hiking or thru-hiking where every ounce counts, yes. For car camping or short weekend trips, aluminum is more cost-effective and cooks better.
What size pot do I need for one person?
A 750ml to 1L pot is ideal. It holds enough water for two meals or a large mug of coffee without being overly heavy.
Can I use non-stick pots on the trail?
Yes, but avoid high heat and metal utensils. Non-stick coatings wear down quickly in rough outdoor conditions, so handle them with care.
How do I clean my cookware on the trail?
Use biodegradable soap sparingly and strain your wastewater. In many backcountry areas, you must pack out food particles. A small sponge or coffee filter works well for straining.
Conclusion
Choosing the right cookware set comes down to understanding your specific hiking style and weight budget. Whether you opt for the featherweight durability of titanium or the heat-efficient affordability of aluminum, ensure your system matches your stove and group size. Start by assessing your current pack volume and meal habits, then invest in a set that minimizes weight without sacrificing reliability. Once you have your kitchen sorted, check out our guide on selecting the best water filters for your next trip.


