

How To Choose The Right Backpacking Repair Kits 2026
By Ryan Caldwell
We’ve all been there: the sudden tear in your tent fly during a monsoon, the snapped trekking pole shaft on a class-3 scramble, or the slow leak in your sleeping pad that turns a night’s sleep into an exercise in core strength. Gear failure is inevitable on the trail, but being unprepared for it can turn a minor inconvenience into a trip-ending disaster. The right repair kit isn't about carrying extra weight; it's about carrying insurance against the specific failures of your setup.
Our Top Picks
Affiliate disclosure: if you buy through these links, we may earn a commission at no extra cost to you.

Table of Contents

Quick Answer
A practical backpacking repair kit should prioritize fixing your "Big Three" (shelter, sleep system, pack) using multi-purpose materials like Tenacious Tape and SilNet. A good backpacking repair kit should also cover gear repair, a tent patch, field repair, and compact trail tools without turning into a heavy junk drawer. For 2026, the most efficient approach is a modular system: carry a small, durable pouch containing seam grip, a few patches for fabric tears, and a dedicated pole splint, while relying on your trekking poles or duct tape for structural frame repairs.
The Philosophy of Repair Weight
In the ultralight community, we often obsess over base weight to the gram, but a repair kit is one of the few items where "light" shouldn't mean "fragile." A standard 3-ounce pouch containing heavy-duty duct tape and a bulky glue tube might weigh less than some specialized gear, but it offers limited utility. Instead, think in terms of repair potential per ounce.
Your kit needs to address the most common failure points: abrasion on high-wear areas (pack straps, tent floors), punctures from thorns or rocks, and structural breaks from impact. The goal is to carry materials that can bridge gaps, seal leaks, and reinforce stress points without adding significant bulk. If you are carrying a heavy canvas tent, your needs differ vastly from someone using Dyneema composite fabric.
Essential Fabric & Shelter Fixes
Tent flies and rain jackets are the first line of defense against the elements. When they fail, you get wet, hypothermia sets in, and morale drops. The gold standard for fabric repair is a combination of Tenacious Tape (or similar nylon tape) and SilNet (silicone patching liquid).
Tenacious Tape is excellent for quick fixes on ripstop nylon or polyester, but it can fail in extreme cold or if the surface isn't perfectly clean. SilNet is heavier per ounce but bonds chemically with silicone-treated fabrics (like many high-end tent flies), creating a repair that often outlasts the original fabric. For budget-conscious hikers, clear packing tape works in a pinch for temporary shelter patches, but it degrades quickly in sun and heat.
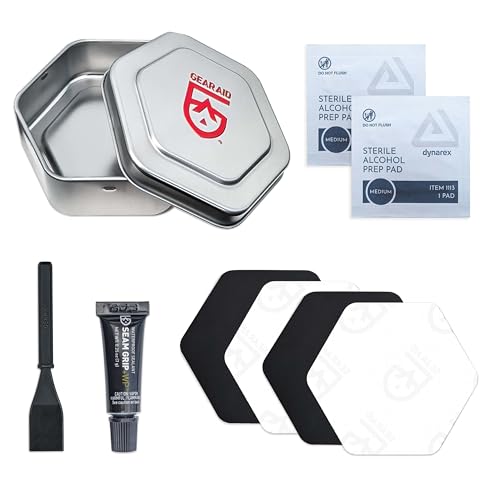
Don't forget seam sealer. Over time, the factory-applied coating on your tent seams can wear off. A small bottle of gear aid or silicone sealant can extend the life of a 5-year-old tent by preventing leaks at the stitch holes.
Structural & Hardware Solutions
Fabric tears are annoying; broken structural components are dangerous. A snapped trekking pole shaft is a classic example. Carrying a pole splint (a small aluminum or carbon fiber tube that slides over the break) is far more reliable than trying to tape a broken pole, which will likely twist under load.
For pack frame repairs, a few feet of paracord and a small roll of duct tape are non-negotiable. Duct tape can lash together a broken hipbelt strap, secure a detached shoulder pad, or even patch a hole in a sleeping bag baffle if used carefully. However, avoid relying on duct tape for high-heat applications (like near a camp stove) or long-term structural integrity.
If you use a hammock, bring a spare carabiner and a few feet of webbing. A broken strap link or a stretched-out suspension can leave you hanging in the air with nowhere to sleep.
Footwear & Hydration Maintenance
Your boots and water filter are critical for mobility and health. For footwear, carry a small tube of shoe goo or similar flexible adhesive. This can reattach a separating sole or patch a hole in the toe box of a trail runner before it expands into a full-blown leak. For hiking boots, a few extra laces are vital; a broken lace is an immediate stop to your hike.
Water filters are notoriously fragile. The ceramic elements in many gravity filters can crack if dropped on rock. Carry a filter repair kit specific to your model (often available from the manufacturer) or a spare O-ring and lubricant. If you use a squeeze filter like a Platypus, bring a spare nozzle cap; losing the cap means your entire liter of filtered water is exposed to contamination.
Assembling Your Kit: Budget vs. Ultralight
Here is how I build my kit based on budget and weight goals:
The Budget/Heavy Option ($15-$20, ~4 oz):
- Large roll of duct tape (wrapped around a trekking pole)
- Full-sized tube of Gear Aid Seam Grip
- Assorted patches (canvas, nylon, rubber)
- Spare shoelaces and zip ties
The Ultralight/Smart Option ($25-$30, ~1.5 oz):
- Small roll of Tenacious Tape (pre-cut patches)
- Mini tube of SilNet (for silicone tents)
- Aluminum pole splint (fits your specific pole model)
- 2 feet of paracord and 1 carabiner
- Spare O-ring for water filter
The ultralight option requires more planning but saves significant weight. The budget option is more forgiving if you forget a specific tool, as duct tape can solve almost any problem.
Frequently Asked Questions
Can I use regular glue for my tent?
No. Standard superglue is brittle and will crack when the fabric flexes. Use silicone-based adhesives like Gear Aid SilNet or Aquanetic for waterproof gear.
How often should I check my repair kit?
Check it before every major trip. Adhesives can dry out over time, and tape loses its stickiness if stored in extreme heat or cold for long periods.
Is a pole splint necessary if I have duct tape?
Duct tape is a temporary fix that often fails under the torsional load of trekking. A metal splint provides structural integrity and is much lighter than trying to wrap a broken pole securely.
What if I don't have a specific repair kit for my filter?
Carry a small piece of silicone sheeting and a drop of silicone sealant. This can often patch minor cracks in plastic housings or O-ring grooves in an emergency.
Should I carry a sewing kit?
For most ultralight hikers, no. Fabric patches are faster and more reliable than sewing on the trail. Only bring a needle and thread if you have a large canvas tent or heavy-duty pack that requires stitching.
Conclusion
Choosing the right repair kit is about matching your gear's vulnerabilities with lightweight, multi-purpose solutions. Don't just throw random items into a bag; curate a kit that addresses the specific failure modes of your backpack, tent, and boots. Start by assessing what breaks most often in your setup, then build a kit around those weaknesses. Your future self, shivering in a rainstorm or limping on a broken pole, will thank you for the few extra grams you carried.


