

How To Choose The Right Backpacking Quilts 2026
By Ryan Caldwell
If you’ve spent enough nights on the trail, you know the specific dread of waking up at 3 AM with frozen toes and a cold backside. For years, I was loyal to traditional mummy bags because they felt "safe," but that safety came with a heavy price: excess weight and bulk. Switching to a backpacking quilt changed my hiking experience from a battle against the elements to an exercise in efficiency. However, quilts aren't just "open sleeping bags"; they are specialized systems that require a different approach to insulation and weather protection. Choosing the right one isn't about finding the warmest bag; it's about finding the most efficient thermal envelope for your specific body heat and the conditions you'll face.
Our Top Picks
Affiliate disclosure: if you buy through these links, we may earn a commission at no extra cost to you.

Table of Contents
Quick Answer
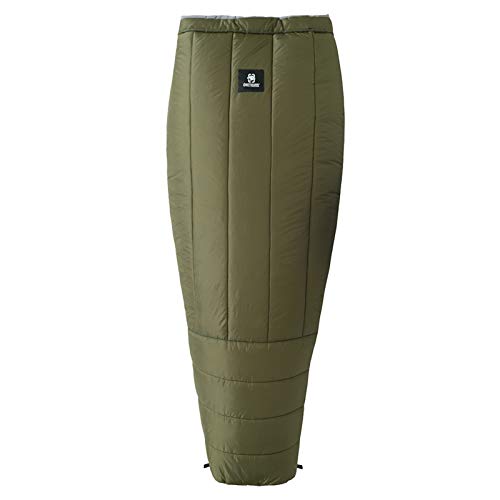
To choose the right backpacking quilt, prioritize a temperature rating that matches your expected low (minus 10°F for safety), select a fill power of at least 800 for weight savings, and ensure the exterior fabric has a DWR coating for weather resistance. Most importantly, match the quilt's width to your body shape—too wide creates dead air space you must heat, while too narrow compresses insulation and kills warmth.
Understanding Fill Power and Weight Trade-offs
In the ultralight community, fill power is the single most important metric for determining how much warmth you get per ounce. Fill power measures the volume one ounce of down occupies in cubic inches. For backpacking quilts in 2026, you should be looking at a minimum of 800-fill power. While 650-fill options exist and are cheaper, they require significantly more down to achieve the same warmth, resulting in a heavier pack load.
When comparing price points, budget quilts often use 600-700 fill or synthetic insulation. Synthetic is great if you expect constant wetness (like the Pacific Crest Trail in spring), but it adds bulk and loses insulating ability when compressed. High-end quilts ($250+) will use 900-fill down, which allows for a lower packed weight—often under 12 ounces for a 20°F rating. However, down requires careful handling; if you crush it tightly in your pack without a compression sack, it takes time to loft again.
The Critical Role of Shell Fabric Denier
The fabric that holds the down is called the shell, and its thickness is measured in denier (den). This directly impacts durability and weight. In my experience testing gear across different terrains, denier choice dictates whether your quilt survives a rocky shelter floor or tears on a thorn bush.
Ultralight quilts often use 7D to 15D nylon. These feel like tissue paper but save crucial ounces. They are perfect for the Appalachian Trail where you stay in maintained shelters, but they will shred instantly if you drag them over granite slabs or sleep on sharp pine needles. Mid-range quilts typically use 20D to 30D fabric, which offers a sweet spot between weight and durability. If you are bushwhacking or sleeping on the ground frequently, do not compromise on denier; stick to 30D or higher to ensure trail durability.
Fit, Width, and Dead Air Space
A common mistake new quilt users make is buying a "unisex" or oversized quilt to feel cozy. This is thermodynamically inefficient. A quilt that is too wide creates "dead air space"—the volume of air between your body and the insulation. Your body heat must warm this entire void before it warms you. If the quilt is too narrow, it compresses the down against your skin, destroying its loft and insulating properties.
You need to measure your shoulder width and hip width. Most quality quilts offer "Slim," "Regular," and "Wide" fits. For a true ultralight setup, choose the slimmest fit that allows you to move without compressing the baffles. If you are a side sleeper, look for quilts with elasticized hoods or drawcords that can cinch down around your shoulders to eliminate that dead air space.
Weatherproofing: DWR vs. Waterproof
Down loses all insulating power when wet. This is the Achilles' heel of quilts compared to synthetic bags. Therefore, the treatment of the shell fabric is critical. Almost all modern quilts come with a Durable Water Repellent (DWR) coating. This causes water to bead up and roll off in light rain or morning dew.
However, DWR is not waterproof. If you are hiking in the Hoh Rain Forest or carrying a hammock for wet climates, a standard nylon shell will eventually soak through. In these cases, consider quilts with Pertex Quantum Shield or similar laminated membranes, or simply carry a lightweight rain blanket to lay over your quilt. For dry climates like the Southwest, standard DWR is sufficient and lighter.
Integration with Your Sleeping Pad
A backpacking quilt is only half the equation; the other half is your sleeping pad. Unlike a bag that encloses you, a quilt leaves your back exposed to the ground. Cold air sinks, and if your pad has an insufficient R-value (insulation rating), the quilt will not save you from conductive heat loss.
In 2026, many high-end quilts feature "straps" or "loops" on the bottom corners designed to clip onto specific sleeping pads (like Therm-a-Rest or NEMO) to prevent shifting. If your pad doesn't have compatible attachment points, look for a quilt with a full-length zipper or elastic hem that can tuck under your pad. This creates a sealed envelope, preventing cold air from drafting underneath you.
Frequently Asked Questions
Can I use a quilt in the rain?
Yes, but only if it has a DWR coating and you are not in heavy, sustained downpour. For wet conditions, use a waterproof bivy sack over the quilt or opt for synthetic insulation which retains warmth when damp.
Do I need a special sleeping bag liner?
No, but it helps. A silk or synthetic liner adds about 5-10°F of warmth and protects the quilt's interior from body oils, extending its life. It also makes cleaning easier than washing a whole quilt.
How do I stop my quilt from slipping off my pad?
Look for quilts with elasticized hems or attachment straps. If yours doesn't have them, you can sew loops onto the corners and use carabiners or cord to tie it to your pad's anchor points.
Is down better than synthetic for quilts?
For weight-conscious hikers, yes. Down offers the best warmth-to-weight ratio. Synthetic is heavier and bulkier but performs better in wet environments where drying time is impossible.
What temperature rating should I choose?
Choose a rating 10-15 degrees lower than the coldest temperature you expect to sleep in. Manufacturers often rate bags optimistically; real-world performance depends on your metabolism and gear setup.
Choosing a backpacking quilt is an investment in comfort and efficiency. By focusing on fill power for weight, denier for durability, and fit for thermal efficiency, you can build a system that keeps you warm without weighing you down. Start by assessing your typical climate and sleeping surface, then prioritize the insulation type that matches those conditions. Once you make the switch, you'll likely find yourself packing lighter and sleeping deeper than ever before.


